PlayCanvasホスティング
あなたのゲームを公開する最も速くて簡単な方法は、playcanvas.comに公開することです。
PlayCanvasに公開するには、2つの単純な手順が必要です。
- 新しい ビルド(build) を公開
- ビルドを 主ビルド(Primary Build) に設定
公開するにはプロジェクトに最低ひとつのシーンが必要です。
新規ビルドの公開
- プロジェクトに移行してEditorを開く。
- 左側のツールバーのボタンをクリックするか左上メニューからPublishingをクリック。

- Publishingダイアログが開きます。ここから自己ホスティング用のビルドを公開したり、ビルドをダウンロードすることができます。
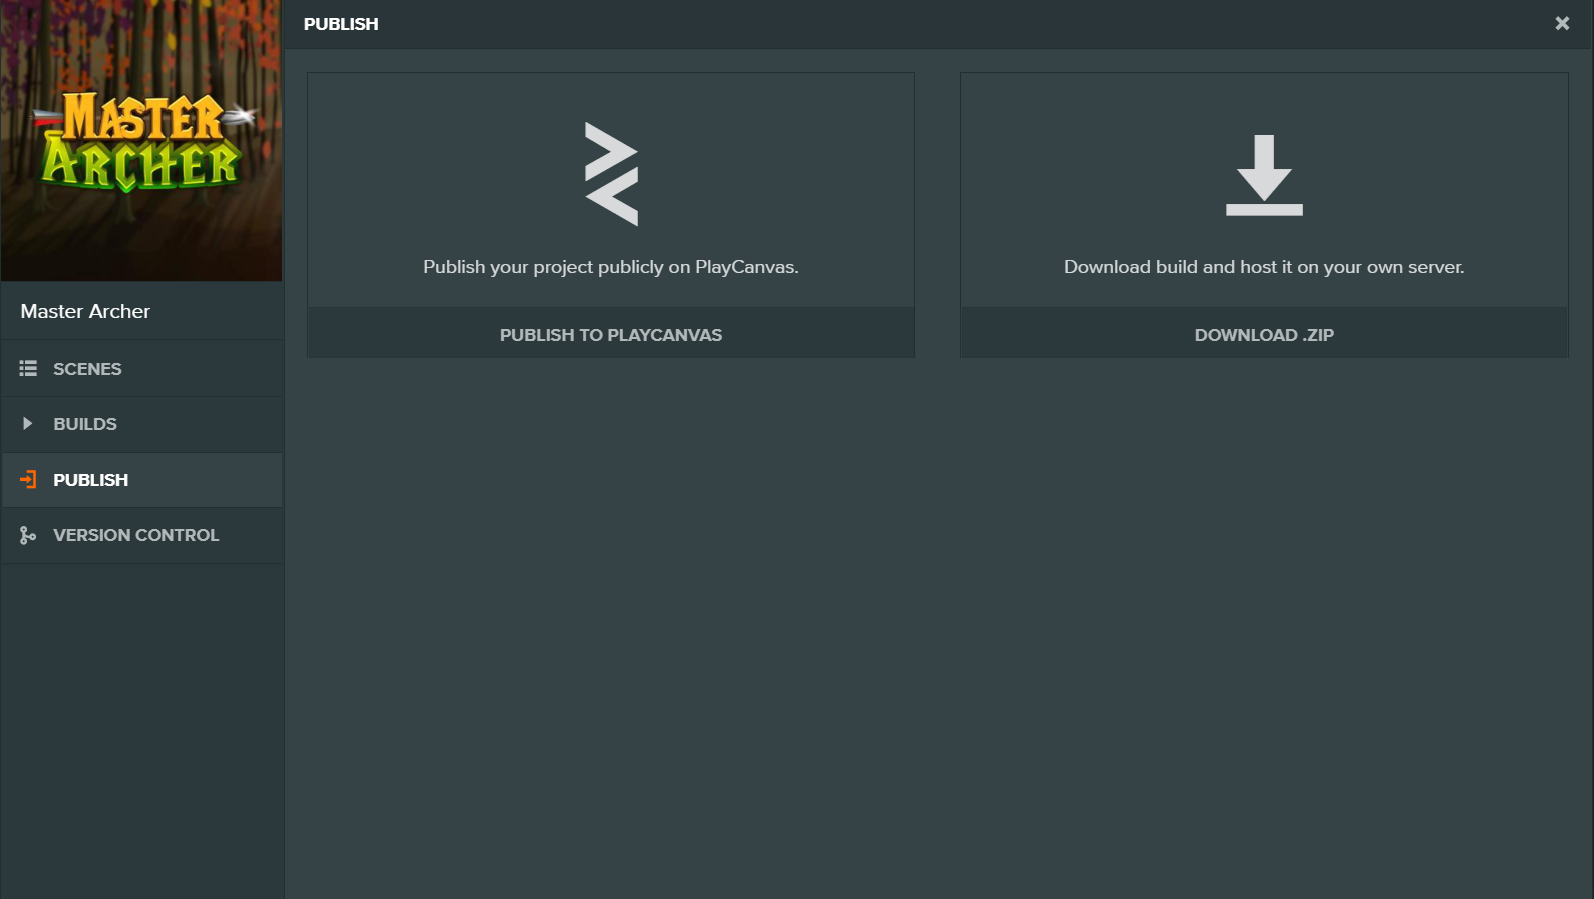
- "Publish on PlayCanvas"の横のPUBLISHボタンをクリック。
-
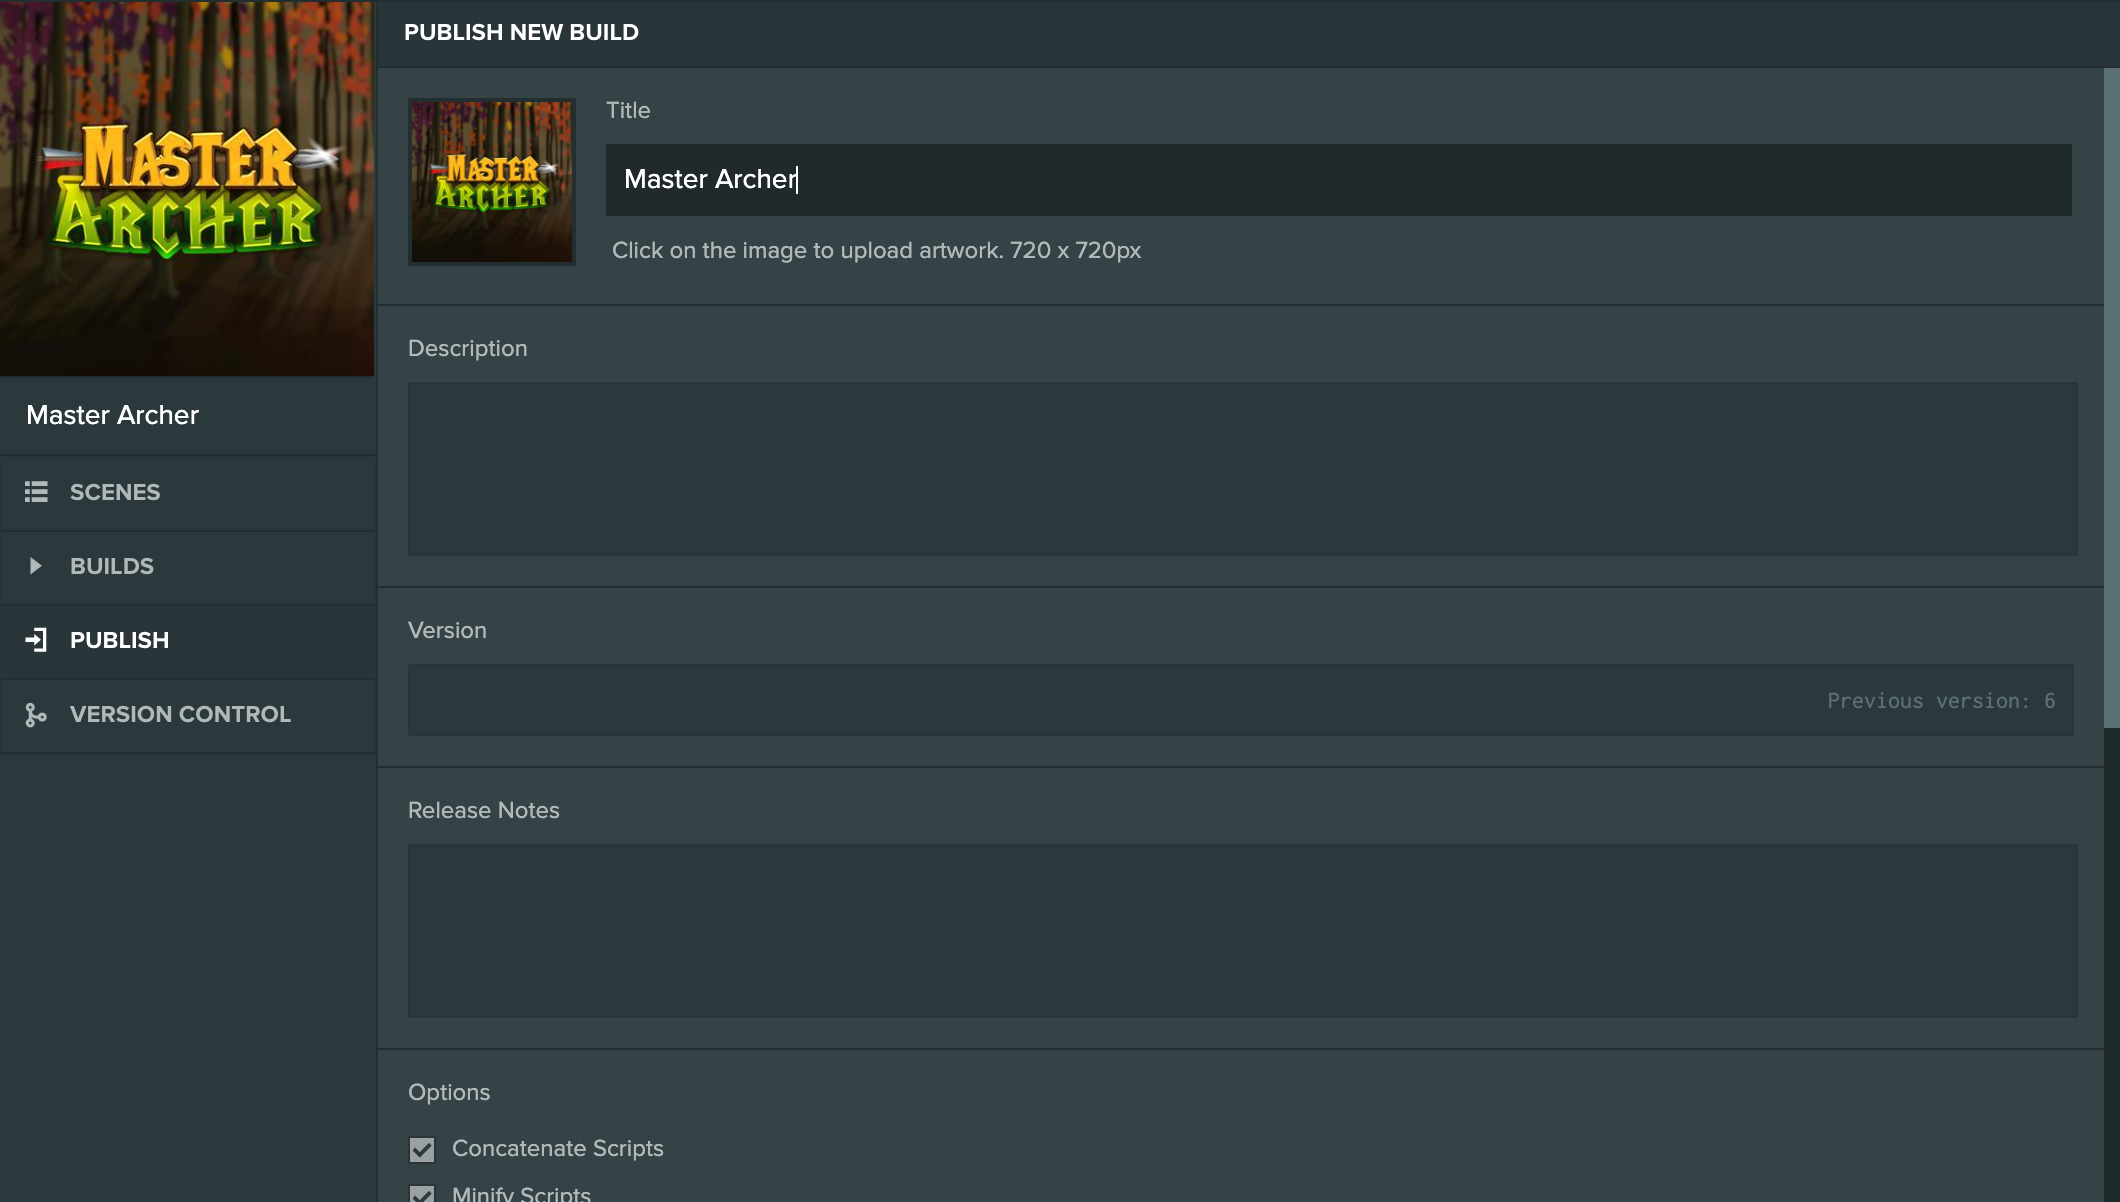
次に、新しいビルドに関するいくつかの詳細を記入する必要があります。使用可能なフィールドは以下のとおりです:
- Image: 必要に応じて異なる画像をアップロードするには、画像をクリックします。これは、ソーシャルメディアでビルドを共有する際に使用されます。
- Title: ビルドのタイトル
- Description: ビルドの説明。これはビルドのリンクをソーシャルメディアで共有する際に使用されます。
- Version: バージョンは、ビルドを区別するのに役立ちます。あなたにとって意味がある値を使用してください。
- Release Notes: このビルドで行われた新しい変更を入力します。バージョンと同様に、これはあなただけに表示されますので、ビルドの追跡がしやすくなります。
- Concatenate Scripts: PlayCanvasスクリプトを1つのJavaScriptファイルにまとめるには、これをチェックしてください。
- Minify Scripts: PlayCanvasスクリプトを最小化してファイルサイズを縮小するには、これをチェックしてください。
- Generate Source Map: ビルドにソースマップを含めます。これはデバッグに役立つことがありますが、通常はアプリの本番バージョンを公開する際に無効になります。
- Optimize Scene Format: シーンJSONを最大50%まで圧縮します。詳細はこちらで確認できます。

- ビルドに含めるシーンをリストから選択します。バナーアイコンが表示されているシーンがビルドに含まれている場合、ビルドが起動されるときは最初にそのシーンがロードされます。
- 'PUBLISH NOW' をクリックします。
- BUILDSタブに新しいビルドが作成されたことが確認できます。処理が完了するまでお待ちください。
- あなたのWebアプリが公開されました!公開されたURLからツイートしたりFacebookで共有したりしてください。
ビルドは次の形式で永久的リンクを与えられます: https://playcanv.as/b/BUILD_ID/ 。このリンクはビルドを削除しない限り有効です。ゲームへのリンクを共有したい場合は、以下の公開されたプロジェクトリンクを使用することを推奨します。
主ビルド(Primary Build)の選択
同じポップアップでビルドをクリック。
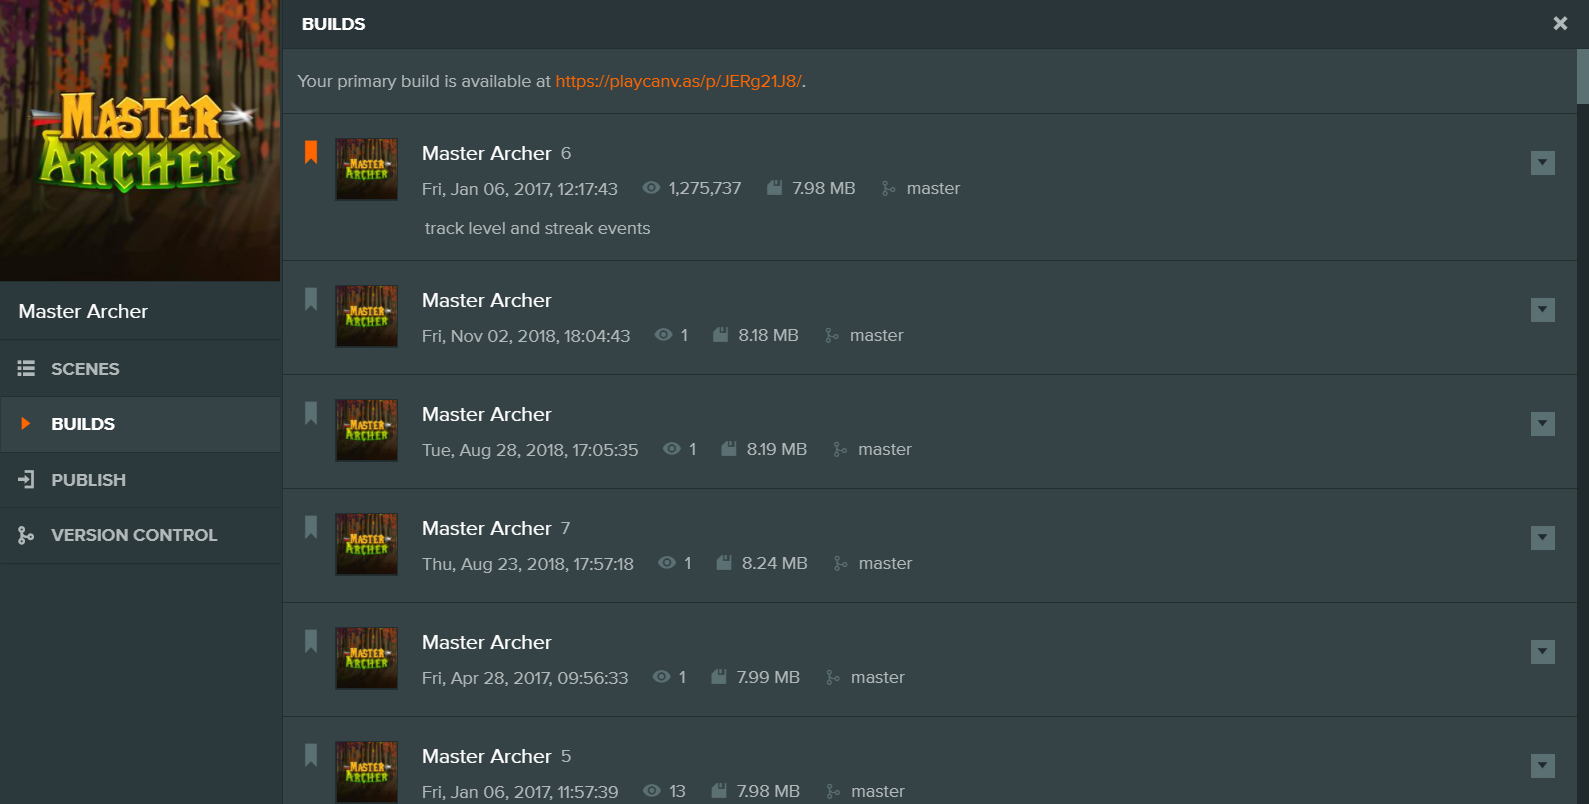
既存の公開ビルドのリストが表示されます。
プロジェクトのホームページのPLAYボタンをクリックすると、ユーザーが再生するビルドは、各ビルドの左側にあるバナーアイコンをクリックして主ビルドに設定できます。
古いビルドを削除する際に壊れたリンクの心配をしなくて済むように、常に最新バージョンのゲームを参照する単一のリンクを持っていることは便利です。これが各プロジェクトに主ビルドリンクがある理由です。これは常にhttps://playcanv.as/p/PROJECT_ID/の形式になります。
注記
ゲームへのリンクをシェアする場合は、Primary Buildリンクを使用するべきです。これにより、再公開する際にリンクが変更される心配がなくなります。
ビルドを公開する際に初めて、自動的に主ビルドになります。その後のビルドについては、いつ主ビルドに割り当てるかを選択できます。これにより、ビルドを公開してテストし、最終的にオーディエンスに公開する前に確認できます。