Shaders
When you import your 3D models into PlayCanvas, by default, they will use our Physical Material. This is a versatile material type that can cover a lot of your rendering needs.
However, you will often want to perform special effects or special cases for your materials. To do this you will need to write a custom shader. In this case, you need to use ShaderMaterial.
To create an instance of ShaderMaterial, these are the steps:
Create a description of your shader:
const shaderDesc = {
        uniqueName: 'MyShader',
        vertexGLSL: `
            // write your vertex shader source code in GLSL language
        `,
        fragmentGLSL: `
            // write your fragment shader source code in GLSL language
        `,
        vertexWGSL: `
            // write your vertex shader source code in WGSL language
        `,
        fragmentWGSL: `
            // write your fragment shader source code in WGSL language
        `,
        attributes: {
            aPosition: pc.SEMANTIC_POSITION,
            aUv0: pc.SEMANTIC_TEXCOORD0
        }
    };
Then create instances of your material, which you can use for rendering:
const material = new pc.ShaderMaterial(shaderDesc);
The shader source code can be written in GLSL if you're targeting the WebGL2 or WebGPU platforms, or in WGSL if you're targeting WebGPU only, or both.
If you write a GLSL shader, it is directly supported by the WebGL2 platform. However, on the WebGPU platform, GLSL shaders require transpilation to WGSL using a WASM transpiler. To avoid this transpilation step and achieve native performance related to shader compilation, and avoid additional download of WASM files, you might want to consider writing an equivalent shader in WGSL for the WebGPU platform, which is supported directly.
Preprocessor
Before the shader is used, a preprocessing step is applied, allowing you to manage shader variations effectively.
This preprocessing step follows a typical C-like preprocessor structure, handling directives such as #define, #if, #else, #endif, and similar. This gives you fine-grained control over how the shader code is compiled and customized for different use cases.
You can also use a #include directive to include one of the registered shader chunks. For example: #include "screenDepthPS"
Material Shader Defines
Shader defines can be set on a per-material basis, allowing dynamic customization of shader behavior. For example:
material.setDefine('USE_TEXTURE', true);
material.setDefine('FIRETYPE', 'RED');
This results in the following lines being added to the shader source:
#define USE_TEXTURE
#define FIRETYPE RED
You can then use these defines within the shader for conditional logic:
#if defined(USE_TEXTURE)
// Apply texture-based rendering
#endif

#if FIRETYPE == RED
// Apply red fire effect
#endif
This system enables flexible shader variation without requiring multiple shader files, making it easier to customize rendering for different materials.
RenderPass Defines
The engine provides some defines automatically, allowing integration with render passes. By default, one of these three defines is provided to allow you to write code specific to different render passes:
// Defined for normal forward passes rendering colors
#define FORWARD_PASS

// Defined for shadow rendering passes
// Shader output specifics may depend on the shadow type used
#define SHADOW_PASS

// Defined for the render pass used by the `Picker` class to render mesh instance IDs
#define SHADOW_PICK
If you use a custom render pass, created using CameraComponent.setShaderPass, a matching define is automatically generated. For example:
camera.setRenderPass('custom');
This results in the following define being added to the shader:
#define CUSTOM_PASS
Shader Includes
The engine builds internal shaders out of chunks; small shader functions that are combined to form a final shader. These chunks are also available for use in custom shaders with ShaderMaterial, making it easy to integrate engine functionality.
Vertex Shader
The engine provides predefined shader includes that handle common transformations, normal calculations, and other essential operations. This allows your custom shader to automatically support skinning, morphing and instancing.
For example:
// Includes transformation-related functionality provided by the engine.
// - Automatically declares the `vertex_position` attribute.
// - Handles skinning and morphing if necessary.
// - Adds the following uniforms:
//   - `matrix_viewProjection`
//   - `matrix_model`
//   - `matrix_normal`
// - Provides utility functions:
//   - `getModelMatrix()`
//   - `getLocalPosition()`
#include "transformCoreVS"

// Includes normal-related functionality provided by the engine.
// - Automatically declares the `vertex_normal` attribute.
// - Handles skinning and morphing if necessary.
// - Provides utility functions:
//   - `getNormalMatrix()`
//   - `getLocalNormal()`
#include "normalCoreVS"

void main(void)
{
    // Retrieve the model matrix, accounting for skinning, morphing, or instancing.
    mat4 modelMatrix = getModelMatrix();
    vec3 localPos = getLocalPosition(vertex_position.xyz);
    vec4 worldPos = modelMatrix * vec4(localPos, 1.0);

    // Retrieve the normal matrix and compute the world normal.
    mat3 normalMatrix = getNormalMatrix(modelMatrix);
    vec3 localNormal = getLocalNormal(vertex_normal);
    vec3 worldNormal = normalize(normalMatrix * localNormal);

    // Example: Apply simple wrap-around diffuse lighting using the world normal.
    brightness = (dot(worldNormal, uLightDir) + 1.0) * 0.5;

    // Transform the geometry.
    gl_Position = matrix_viewProjection * worldPos;
}
Fragment Shader
The engine provides predefined shader chunks you can include for common color processing effects such as gamma correction, tone mapping and fog. These includes ensure that colors are processed correctly according to the rendering settings.
Example Usage
#include "gammaPS"       // Adds support for gamma correction of inputs and outputs
#include "tonemappingPS" // Adds support for tone mapping
#include "fogPS"         // Adds support for fog effects

void main(void)
{
    // Evaluate color in linear color space
    vec3 colorLinear = ...;

    // Apply fog if enabled
    vec3 fogged = addFog(colorLinear);

    // Apply tone mapping if enabled
    vec3 toneMapped = toneMap(fogged);

    // Apply gamma correction and output the final color
    gl_FragColor.rgb = gammaCorrectOutput(toneMapped);
    gl_FragColor.a = alpha;
}
These functions are automatically configured based on the engine's settings, ensuring that color processing is consistent across different rendering conditions.
For more complete examples, and also for details on how to implement instancing, refer to the engine examples.
Generated Shaders
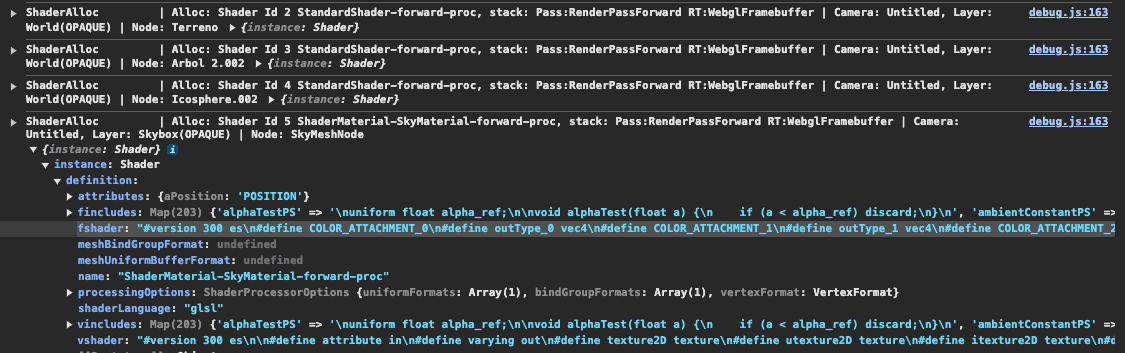
If you have a need to inspect the generated shaders, you can add this to your script
pc.Tracing.set(pc.TRACEID_SHADER_ALLOC, true);
And Each created shader will be logged in the browser console, where you can inspect its source code, for example:
For further information, refer to the ShaderMaterial API documentation.