Lightmapping
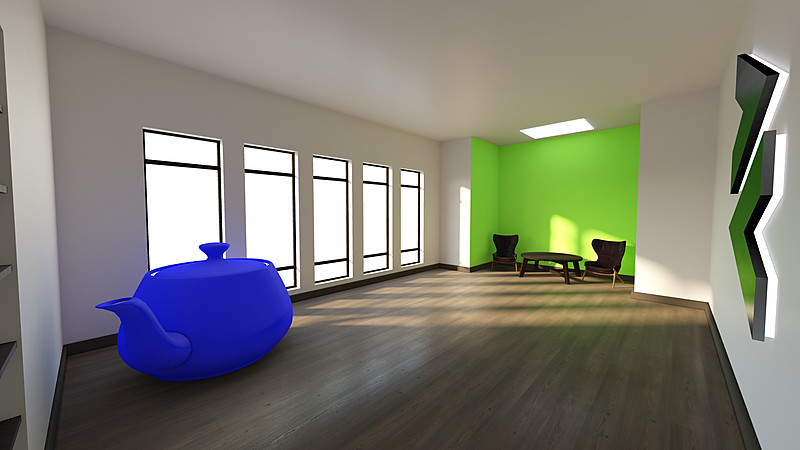 The lighting in this scene is implemented using Lightmap and AO textures and Box Projected IBL (reflections)
Here is the link to final scene and project that uses these techniques to achieve results in image above: External HDR Lightmaps (described in this page below), Ambient Occlusion and HDR Cubemap applied using Box Projection using Image Based Lighting technique to achieve realistic reflections.
Overview
Lightmap generation is the process of pre-calculating lighting information for a static scene and storing it in textures which are then applied on materials. This is an efficient way of lighting a scene if many of the light sources and geometry are static or environmental.
PlayCanvas offers two ways to use lightmaps in your scene: External lightmap generation using a 3rd-party tool and Runtime Lightmapping that can be generated automatically by the Engine on loading or later while application is running.
This page gives details and best practices on rendering lightmaps from external tools.
External Lightmap Generation
Many 3D content tools have ways to generate lightmap textures. For example, 3ds Max, Maya, Blender and other tools all have ways to bake lightmaps into textures. The advantages of using an offline tool for lightmap generation is that you can use very sophisticated lighting calculations like Global Illumination for bounce lighting, soft shadows, ambient occlusion, etc. The major disadvantage is that you have to have a complete representation of your scene inside the 3D tool. So if your PlayCanvas scene is made up of lots of instances positioned in the Editor, you need to re-create this inside your lightmapping tool.
Once you have created lightmaps using an external tool you simply upload them as regular texture assets and they can be added to your materials using the lightmap slot in the standard Physical Material.
Tools
In this page we will use 3ds Max with VRay to generate lightmaps, but the same functionality is achievable with any other similar modeling tools.
Gamma Correction
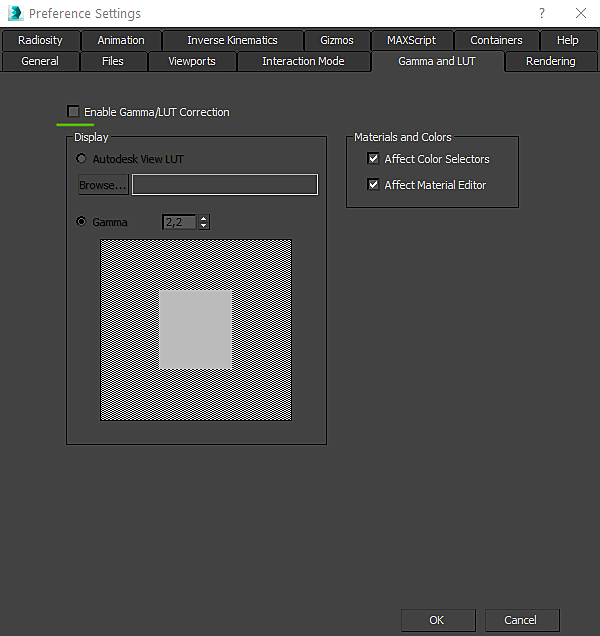
When rendering Lightmaps or CubeMaps they should be rendered in Linear Space to ensure color curves are not affected by gamma correction twice. The PlayCanvas Engine will apply gamma correction during real-time rendering.
In 3ds Max this option (Enable Gamma/LUT Correction) should be disabled and can be found in Preference Settings (Customize > Preferences):
Then make sure Color Mapping is updated. It can be found in Render Settings (F10, or from Render to Texture window). Output should not be clamped, and not post-processed (Mode option), Linear Multiply should be used for linear color space. Here is a screenshot of what options should be set to what values, click the "Default" button to expand settings to "Expert":
UV Mapping
In order to apply a lightmap texture on geometry we need to unwrap it first. Here are some practices that will help you to get good lightmap friendly UV's.
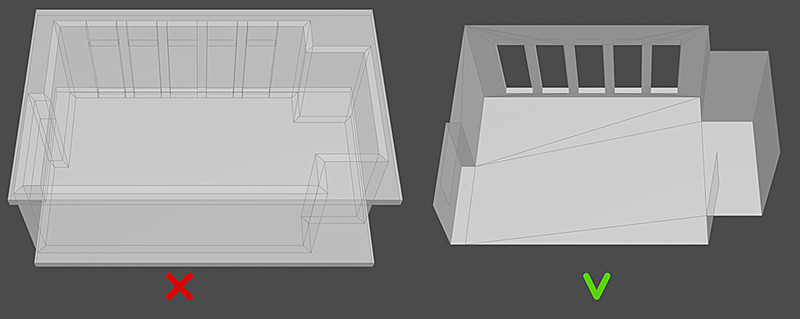
Simple Geometry
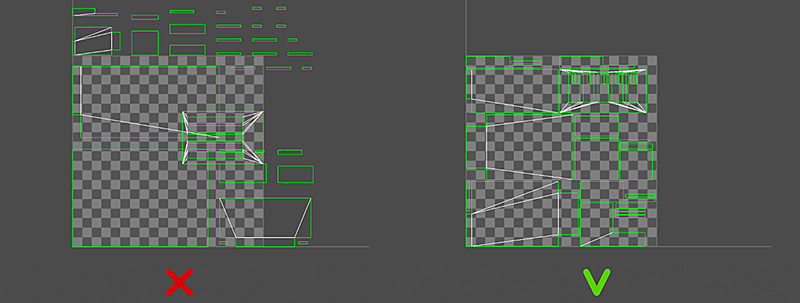
A smaller area of geometry is better. Try to minimize the area of triangles and eliminate non-visible triangles. A larger area will reduce lightmap detail, require larger textures and sometimes multiple assets.
Consistent Texel Size
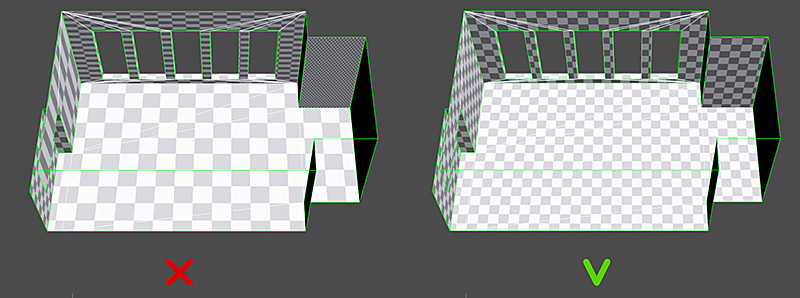
Keep texels in UV unstretched and consistent in size with other texels within same geometry. This is to ensure that level of detail in lightmap texture is consistent within the scene. Some variations of texel size could be applied when geometry will be seen from up close or in the far distance as required by artistic and optimization decisions.
Non-overlapping UV
Triangles in UV should not overlap to ensure each pixel has a unique position in 3D space on geometry so it can store its own illumination information appropriately. UV space for lightmaps is clamped, meaning that UV will be contained between 0.0 and 1.0 and will not tile outside.
Other Tips
To get good lightmap results we need to ensure that rendering is based only on data that is relevant to light propagation and not to the point of view of camera during rendering.
- Disable normal maps on materials - micro surface details are too tiny to be relevant in lightmap textures.
- Set Reflection to 0 and Disable Gloss Maps on materials - reflection can lead to caustics and complications for renderers, leading to visual artifacts. Generally lightmaps should contain only diffuse lighting and reflectivity should be implemented using some runtime technique.
- Very dark materials won't produce good results as they do not reflect light much and so will not assist Global Illumination.
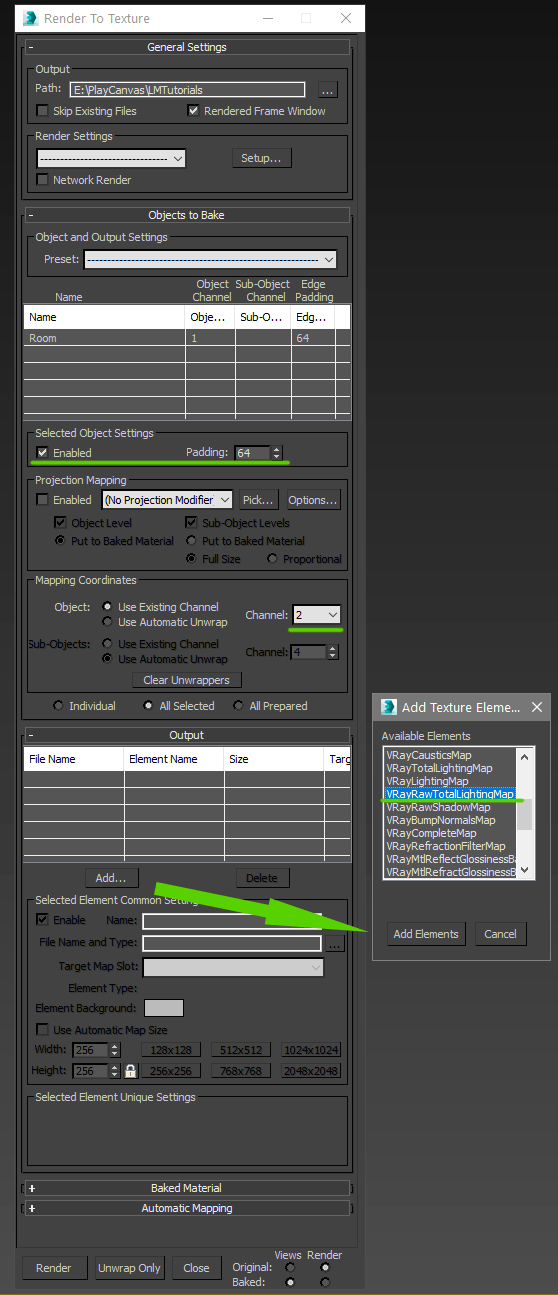
- In the Render To Texture window (see below) set Padding to larger value.
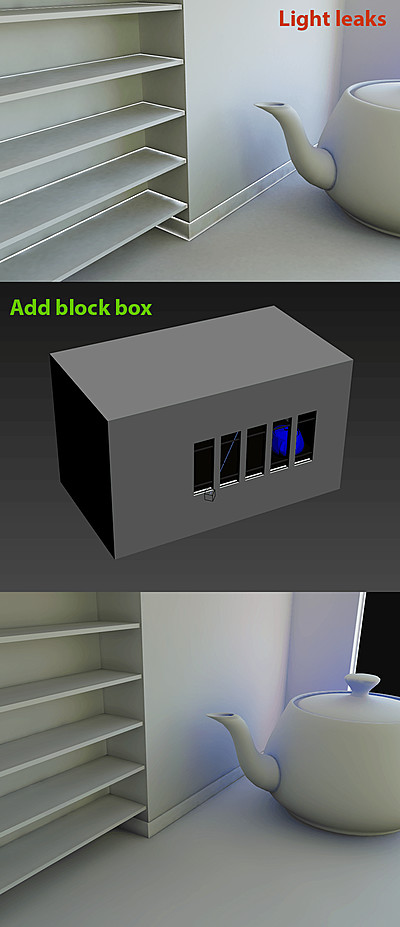
- Light can leak from behind the geometry, add blocking geometry to prevent light.
Render To Texture
To get illumination data out of the modeling tool we want to render the light data into a texture. We can specify resolution and format for it.
In 3ds Max this is done using the Render To Texture window. Where Padding needs to be set to larger value; selected 2nd UV Channel; and Output profile depending on your renderer, in screenshot below VRayRawTotalLightingMap is used.
Noise
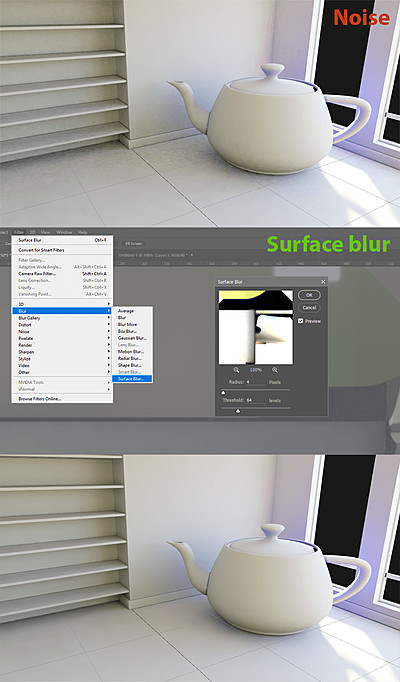
Depending on the quality and time of rendering in some situations the illumination data in the output might be not perfect and suffer from noise. This is easily solvable by applying some blur to the image that will not blur the edges in texture but will smoothen plain sections. In Photoshop this is done using Surface Blur filter:
Upload to Editor
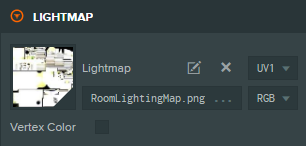
At this stage you have your geometry with a second UV channel (UV1) and HDR lightmap textures and it is time to upload them to your PlayCanvas scene and setup the materials. This is done by dragging and dropping the files or using the upload button in the assets panel. After you've uploaded your geometry it will auto-generate materials. For each material that a lightmap is rendered for you need to set the lightmap texture. Simply select all required materials and drag'n'drop or pick lightmap texture for the Lightmap slot.
Final remarks
Gamma correction, tone mapping and exposure - are good settings that you will want to play with to get the desired look and color for your scene.
You can explore the example that uses the techniques described above and also its project.