エディターAPI
エディターAPI はベータ機能です。ライブプロジェクトで使用する際は注意してください。
現在ベータ版の「Editor API」をエディターからアクセスでき、基本機能を自動化および拡張するのに役立つAPIがあります。
このAPIは、安定版ではなく将来的に変更される可能性がありますが、現在の状態から大きく変更されることはないでしょう。
The Editor APIはGitHubでオープンソース化されています。APIのドキュメントはこちらで見つけることができます。
自動化の例
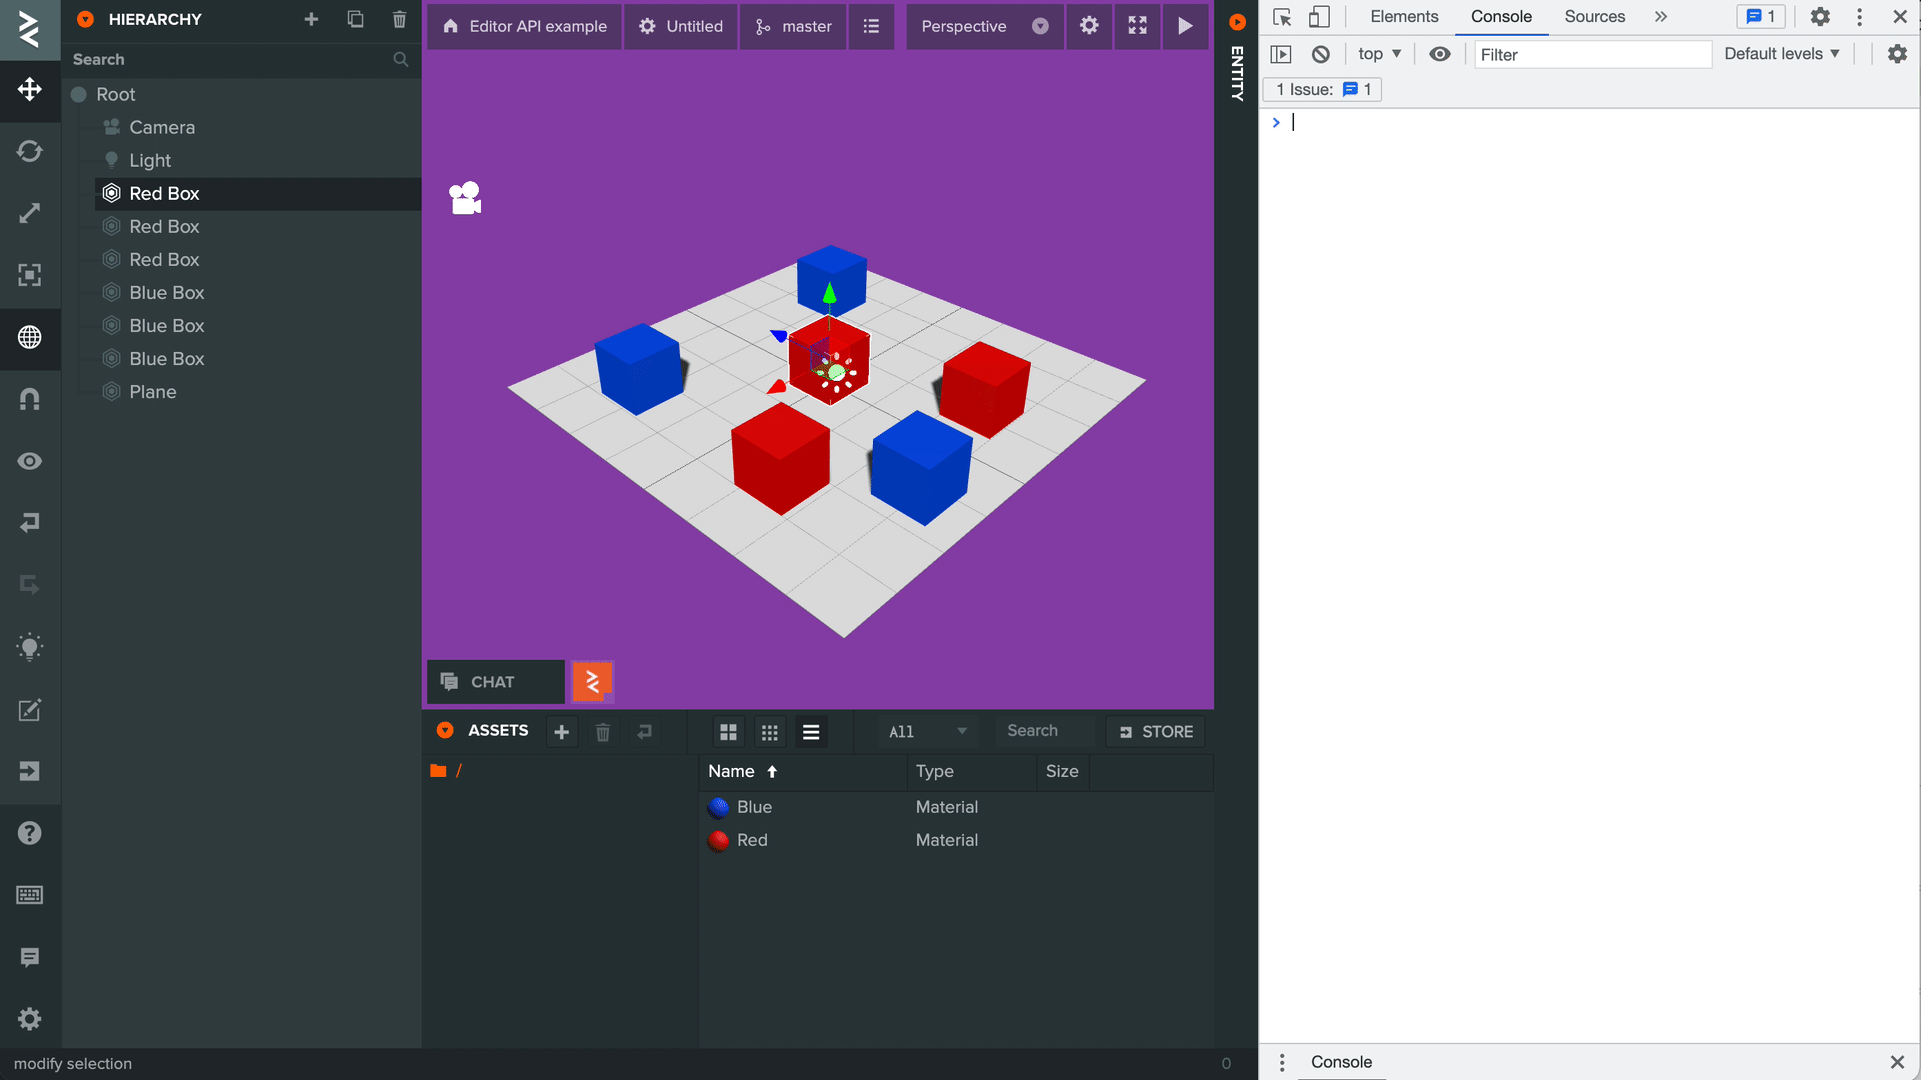
APIはブラウザの開発者ツールコンソールを介してアクセスでき、繰り返しタスクを自動化することができます。以下の例では、エディタを使用して、タグ「red」を持つすべてのエンティティを検索し、ブラウザコンソールでコードを実行して無効にしています。
Editor API コード:
(function(){
    const entities = editor.entities.root.listByTag('red');
    for (const entity of entities) {
        entity.set('enabled', false);
    }
})();
エディタの機能の拡張
エディターに追加の機能を追加し、カスタムインタフェース(ボタンの追加など)を作成することができます。これは、ブラウザー拡張またはユーザースクリプトなどで実行することができます。
これら2つのうち、よりアクセスしやすいのはユーザースクリプトで、エディタの上にカスタムコードを実行することができます。
以下には、Viewportにボタンが追加され、ボックスをシーンにランダムに配置する例があります。
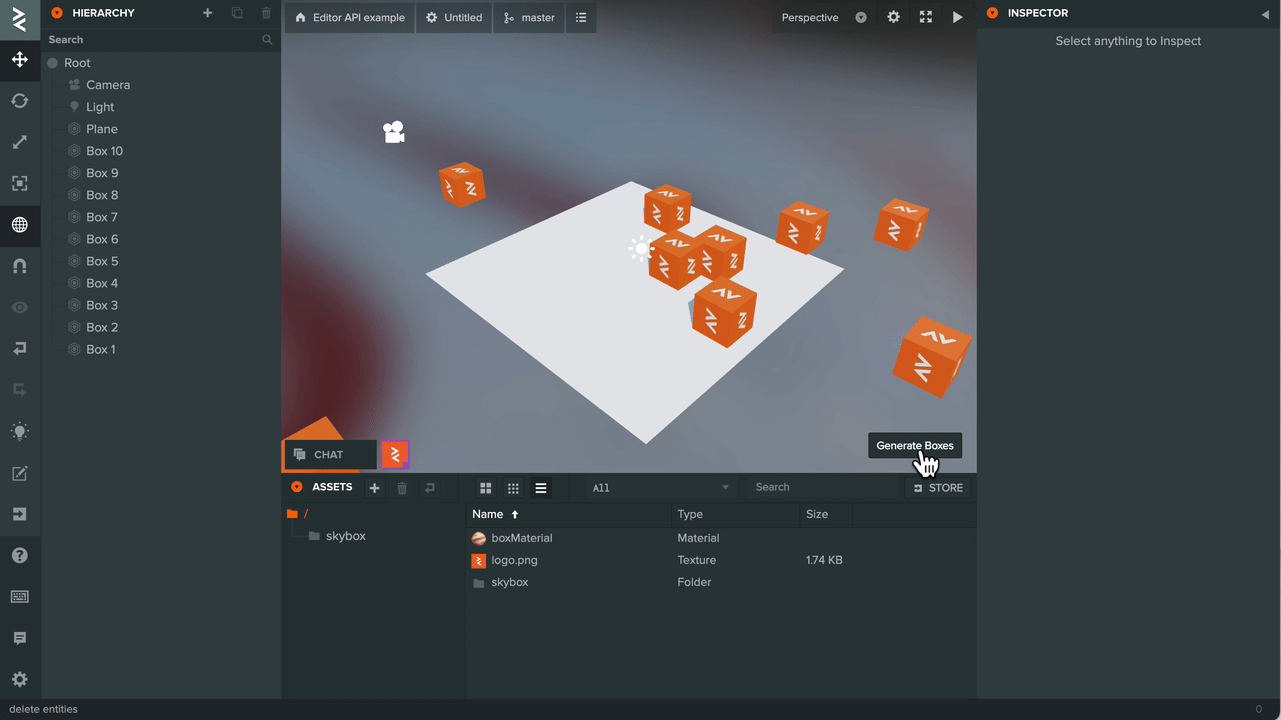
PlayCanvas チームは現在、Violentmonkeyオープンソースブラウザーエクステンションを使用してユーザースクリプトを管理しています。
ブラウザー拡張をインストールしたら、簡単にカスタムコードを追加できます。手順については、Violentmonkeyのドキュメントを参照してください。
上記のユーザースクリプトのコードは次のとおりです。
// ==UserScript==
// @name        Example Script
// @namespace   Violentmonkey Scripts
// @match       https://playcanvas.com/editor/scene/*
// @grant       none
// @version     1.0
// @author      -
// @description 20/10/2021, 11:40:21
// ==/UserScript==

(function() {
    async function generateBoxes(count, position, radius) {
        // create box entity
        const box = editor.entities.create({ parent: editor.entities.root });
        // find box material asset
        const boxMaterial = editor.assets.findOne(asset => asset.get('name') === 'boxMaterial');
        // add render component
        box.addComponent('render', {
            type: 'box',
            materialAssets: [boxMaterial.get('id')]
        });

        // add a number of boxes around a point in the scene
        let offset = new pc.Vec3();
        let rotation = new pc.Quat();
        const result = [];

        for (let i = 0; i < count; i++) {
            const boxCopy = await box.duplicate();
            boxCopy.set('name', 'Box ' + (i + 1));
            offset.set(1, 0, 0);
            rotation.setFromEulerAngles(0, pc.math.random(-360, 360), 0);
            offset = rotation.transformVector(offset);
            offset.scale(pc.math.random(-radius, radius));
            boxCopy.set('position', [position.x + offset.x, position.y + offset.y, position.z + offset.z]);

            result.push(boxCopy);
        }

        // delete original box
        box.delete();

        return result;
    }

    function createButton() {
        const btn = new pcui.Button({ text: 'Generate Boxes' });
        btn.style.position = 'absolute';
        btn.style.bottom = '10px';
        btn.style.right = '10px';
        editor.call('layout.viewport').append(btn);

        let boxes;

        btn.on('click', () => {
            // delete existing boxes
            if (boxes) {
                editor.entities.delete(boxes);
                boxes = null;
            }

            generateBoxes(10, new pc.Vec3(), 10).then(result => {
                boxes = result;
            });
        });
    }

    // Wait until the Editor is available before adding the button
    editor.once('load', () => createButton());
})();
スクリプトの重要な部分を解説します。
スクリプトの最上部には、他のユーザーとスクリプトを共有する場合の情報ヘッダーがあります。重要な行は、スクリプトがロードされるURLを制御する @match 属性です。このケースでは、任意のPlayCanvasシーンにロードされるように設定されています。これをどのように変更するかの詳細は、Violentmonkeyのドキュメンテーションで見つけることができます。
// ==UserScript==
// @name        Example Script
// @namespace   Violentmonkey Scripts
// @match       https://playcanvas.com/editor/scene/*
// @grant       none
// @version     1.0
// @author      -
// @description 20/10/2021, 11:40:21
// ==/UserScript==
これは、エディターが完全にロードされたときのイベントを待つためのプライベートなエディターAPI (Editor API)です。このイベントを使用することで、エディター機能を拡張するためのコードが実行される前に、Editor APIが利用可能であることが確保されます。
    // ボタンを追加する前に、エディタが利用可能になるまで待つ
    editor.once('load', () => createButton());
作成されるボタンは、エディタも使用しているPCUIフレームワークライブラリからのものです。また、ボタンをアタッチするためのビューポートDOMを取得するために、いくつかのプライベートAPIを使用しています。
    function createButton() {
        const btn = new pcui.Button({ text: 'Generate Boxes' });
        btn.style.position = 'absolute';
        btn.style.bottom = '10px';
        btn.style.right = '10px';
        editor.call('layout.viewport').append(btn);

        let boxes;

        btn.on('click', () => {
            // delete existing boxes
            if (boxes) {
                editor.entities.delete(boxes);
                boxes = null;
            }

            generateBoxes(10, new pc.Vec3(), 10).then(result => {
                boxes = result;
            });
        });
    }