UI - プログレスバー
Elementコンポーネントを使用するプログレスバー。フルシーンを参照してください
ビルトインElementsを使用してプログレスバーを簡単に作成できます。本チュートリアルでは、数秒ごとに空からいっぱいにループするプログレスバーを使用しています。
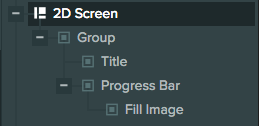
ヒエラルキー (Hierarchy)
UIの構造は次のようになります。
スクリーンの設定
スクリーンは次のように設定されています。
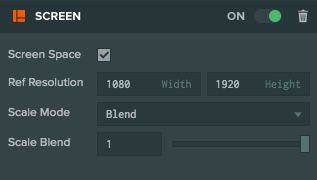
2D�スクリーンであるため、 Screen Space を選択しました。 Reference Resolution は、ターゲットとしている解像度です。この場合、1080 x 1920です。スケールモードとしてBlendを選択しているため、スクリーンは解像度の変更に適応します。また、スケールブレンドを1に設定しているため、スクリーンは高さの変更にのみ適応されます。
スクリーンには、POWERテキストを表示するための子テキストエレメントと、プログレスバーを表示するためのエンティティであるProgress Barが含まれています。
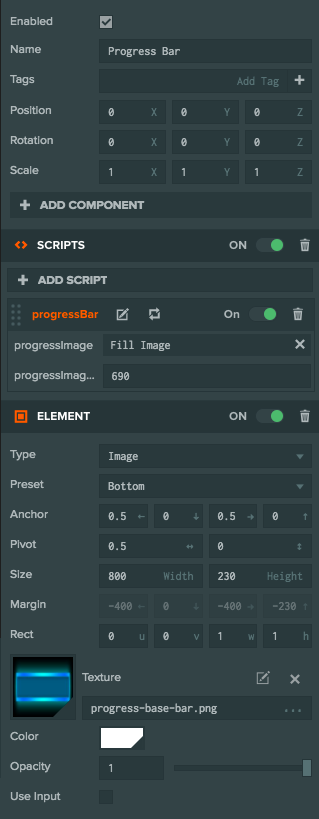
プログレスバーの設定
プログレスバーは2つのElementで構成されています。バックグラウンド画像とフィル画像です。
バックグラウンド画像はProgress Barエンティティです。それには、プログレスバーの背景画像を表示する画像エレメントがあります。
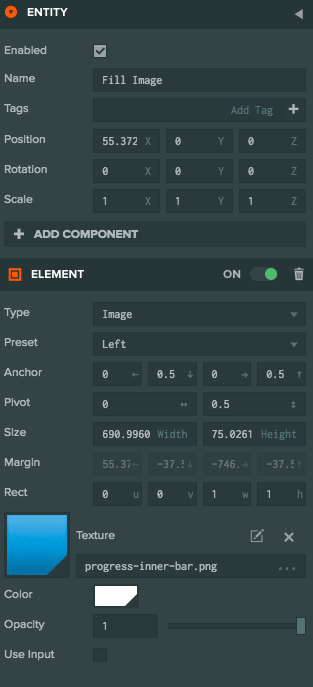
フィル画像は、Fill Imageエンティティです。それはProgress Barエンティティの子要素であり、プログレスバーのフィルを表示するImage Elementがあります。このイメージは、親バックグラウンド画像の左にアンカーが設定されているため、要素の幅を変更してプログレスバーを拡大できます。
スクリプト (Script)
Progress Barエンティティには、プログレスバーのサイズ変更を制御するスクリプトが用意されています。
var ProgressBar = pc.createScript('progressBar');

// The entity that shows the fill image
ProgressBar.attributes.add('progressImage', {type: 'entity'});
// The maximum width of the fill image
ProgressBar.attributes.add('progressImageMaxWidth', {type: 'number'});

ProgressBar.prototype.initialize = function() {
    // use our own rect object to set the size of
    // the progress bar
    this.imageRect = this.progressImage.element.rect.clone();

    // initialize progress to 0
    this.setProgress(0);
    // if true the progress bar will increase
    // otherwise it will decrease in update
    this.increase = true;
};

// Set progress - value is between 0 and 1
ProgressBar.prototype.setProgress = function (value) {
    // clamp value between 0 and 1
    value = pc.math.clamp(value, 0, 1);

    this.progress = value;

    // find the desired width of our progress fill image
    var width = pc.math.lerp(0, this.progressImageMaxWidth, value);
    // set the width of the fill image element
    this.progressImage.element.width = width;

    // Set the width of the element's rect (rect.z) to be the same
    // value as our 0-1 progress.
    // This is so that the fill image will only show the portion
    // of the texture that is visible
    this.imageRect.copy(this.progressImage.element.rect);
    this.imageRect.z = value;
    // force rect update
    this.progressImage.element.rect = this.progressImage.element.rect;
};

// Increase or decrease the progress automatically
ProgressBar.prototype.update = function(dt) {
    var diff = this.increase ? dt : -dt;
    this.setProgress(this.progress + diff);

    if (this.progress >= 1)
        this.increase = false;
    else if (this.progress <= 0)
        this.increase = true;
};
このスクリプトには、フィル画像を表示するエンティティとその画像の最大幅という2つの属性があります。関数setProgressは0から1までの値でプログレスを設定します。
updateメソッドでは、進行状況を0から1の間でループさせます。このスクリプトで重要な点は、進行バーを適��切にリサイズするために、widthとrectを変更する必要があることです。
widthを変更すると、フィルイメージが大きくなります。また、rectを変更することで、表示されるテクスチャの部分のみを表示し、表示されるテクスチャを伸ばさないようにします。こちらはrectのAPIリファレンスです。