Getting Started
This guide takes a raw splat file all the way to a published, shareable scene page. It takes about ten minutes and touches every part of the SuperSplat workflow: Editor → Publish → Studio → Share.
Before you start
- A splat file. Any
.plyproduced by a Gaussian splatting trainer works, as do.compressed.ply,.sog,.splat,.ksplat,.spz, and XGRIDS.lccfiles. Don't have one yet? Creating Splats explains how captures are made and Recommended Tools compares the apps that produce them. Or practice on the sample biker: open it in the Editor. - A free PlayCanvas account for step 3. Loading and editing don't need one; publishing does. See Account Creation.
- A current browser. The Editor runs on WebGPU: current Chrome or Edge, Safari 26 or later, or Firefox with WebGPU enabled. There is nothing to install.
1. Load your splat in the Editor
Open superspl.at/editor and drop your file anywhere in the window. You can also use File → Import.
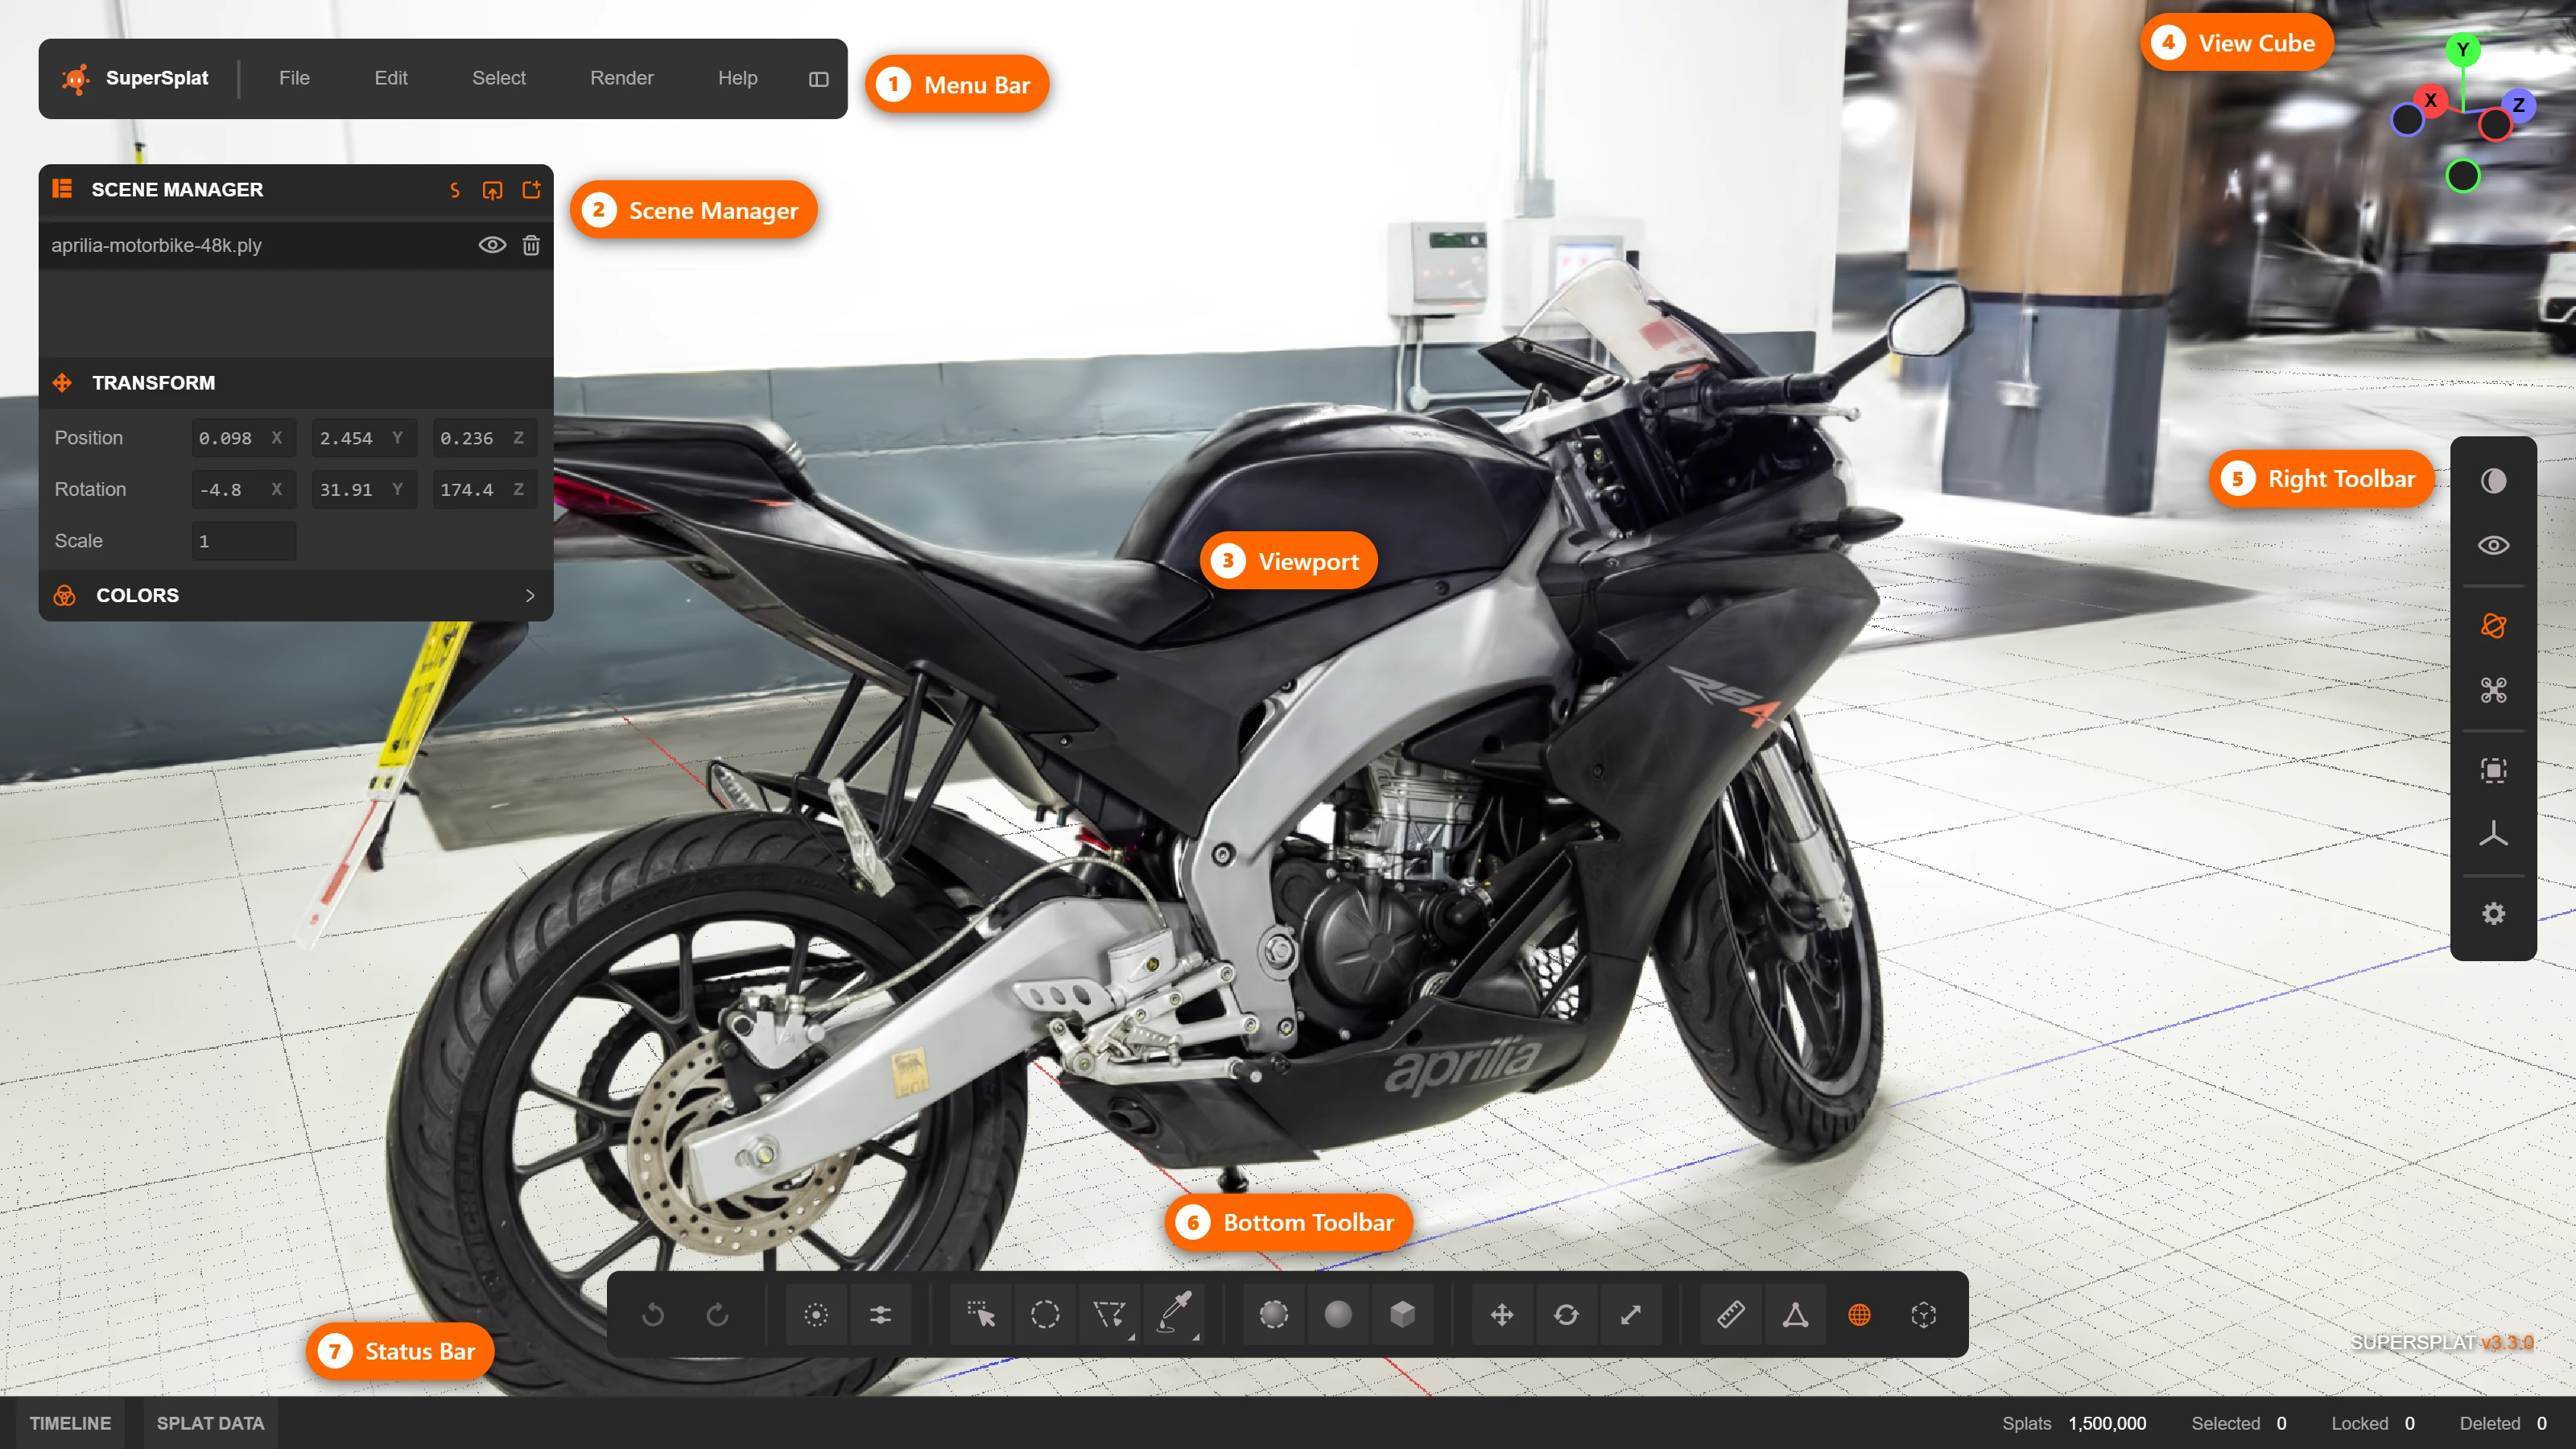
Once the splat appears, get your bearings:
| Do this | To |
|---|---|
| Left-drag | Orbit around the focal point |
| Right-drag | Pan |
| Mouse wheel | Zoom |
| Double-click | Set the focal point |
| Press F | Focus the camera on the current selection |
If the scene is on its side or upside down, select it in the Scene Manager and rotate it upright with the transform controls. See Transform, Measure and Align. The full list of controls is in Camera Controls.
2. Clean it up
Most raw captures contain floaters: stray Gaussians hanging in space where the trainer wasn't sure what it saw. Removing them is the single biggest quality win.
- Turn on Selection Depth (the second toggle at the left of the bottom toolbar, or press N) so selections stop at the visible surface, and press Tab to show the Gaussian centers.
- Pick a selection tool from the toolbar: Brush Selection to paint over floaters, Sphere Brush to paint in 3D along a surface, Sphere Selection or Box Selection to grab a 3D region, or Flood Selection for an isolated patch. Hold Shift to add to the selection and Ctrl to remove from it.
- Press Delete. Rotate the camera, check from another angle, and repeat.
- Removed too much? Use Edit → Undo, or Select → Reset to restore every deleted Gaussian.
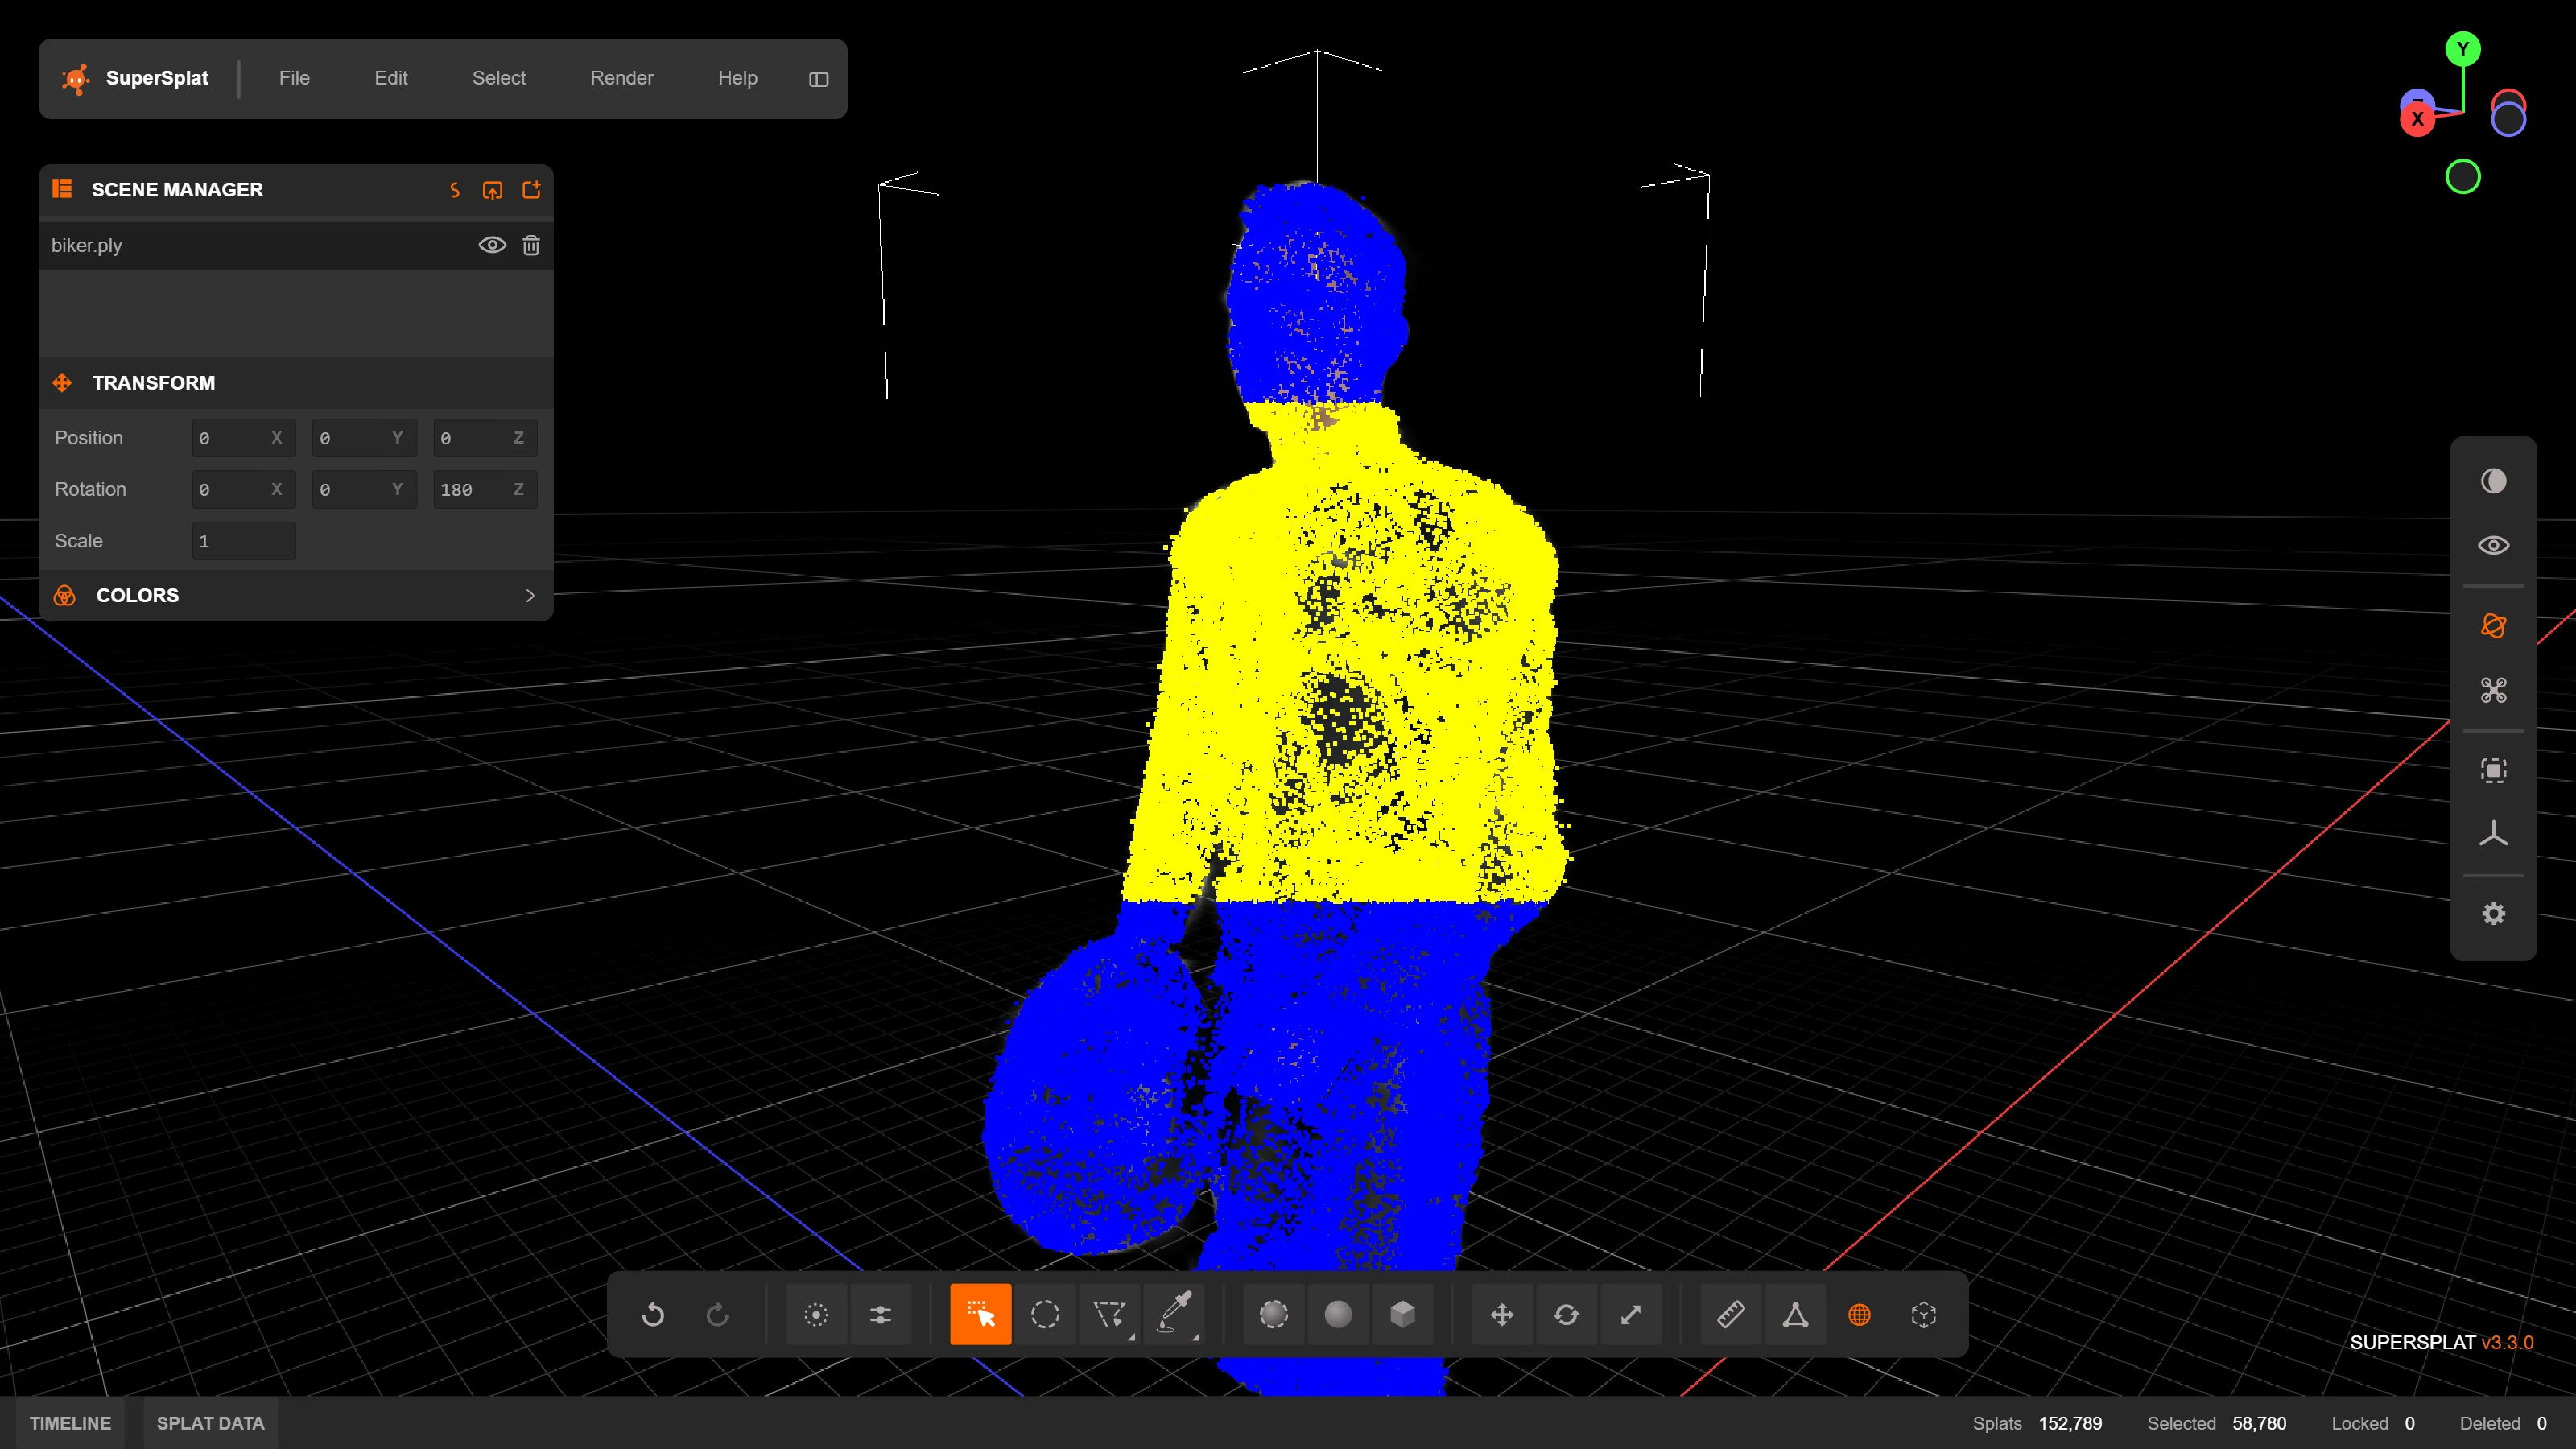
To crop away everything outside your subject, select the region to keep with Box or Sphere Selection, choose Select → Invert, and delete. Selection and Cleanup covers every tool plus more cleanup recipes, and Color and Appearance is where you fix exposure and tint.
Choose File → Save to keep an .ssproj project file. It preserves your edits and project setup so you can pick up where you left off. See Managing Projects.
3. Publish
- Make sure you are logged in at superspl.at (the Login button in the top right). Your avatar appears there when you are.
- Frame your favorite view. The published scene opens with the camera exactly where you leave it.
- Choose File → Publish, give the splat a Title and a Description, and click Publish.
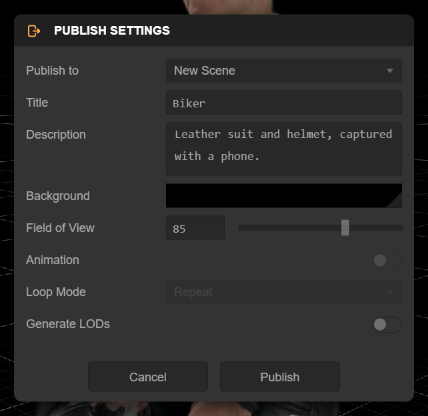
Compression to SOG takes a moment, and several minutes for very large scenes. When it finishes, a dialog shows the URL of your new scene page. New splats are Unlisted: anyone with the link can view them, but they won't appear in Explore until you make them Public in step 5.
If your file needs no editing, skip the Editor. The orange Upload Splat button on superspl.at publishes it directly. See Direct Upload.
Every option in the dialog, including republishing to an existing scene, is covered in Publishing.
4. Curate it in Studio
Your splat now appears on your Manage page. Click Open in Studio in its row, or Edit in Studio on your scene page, to open Studio, where you shape what visitors see.
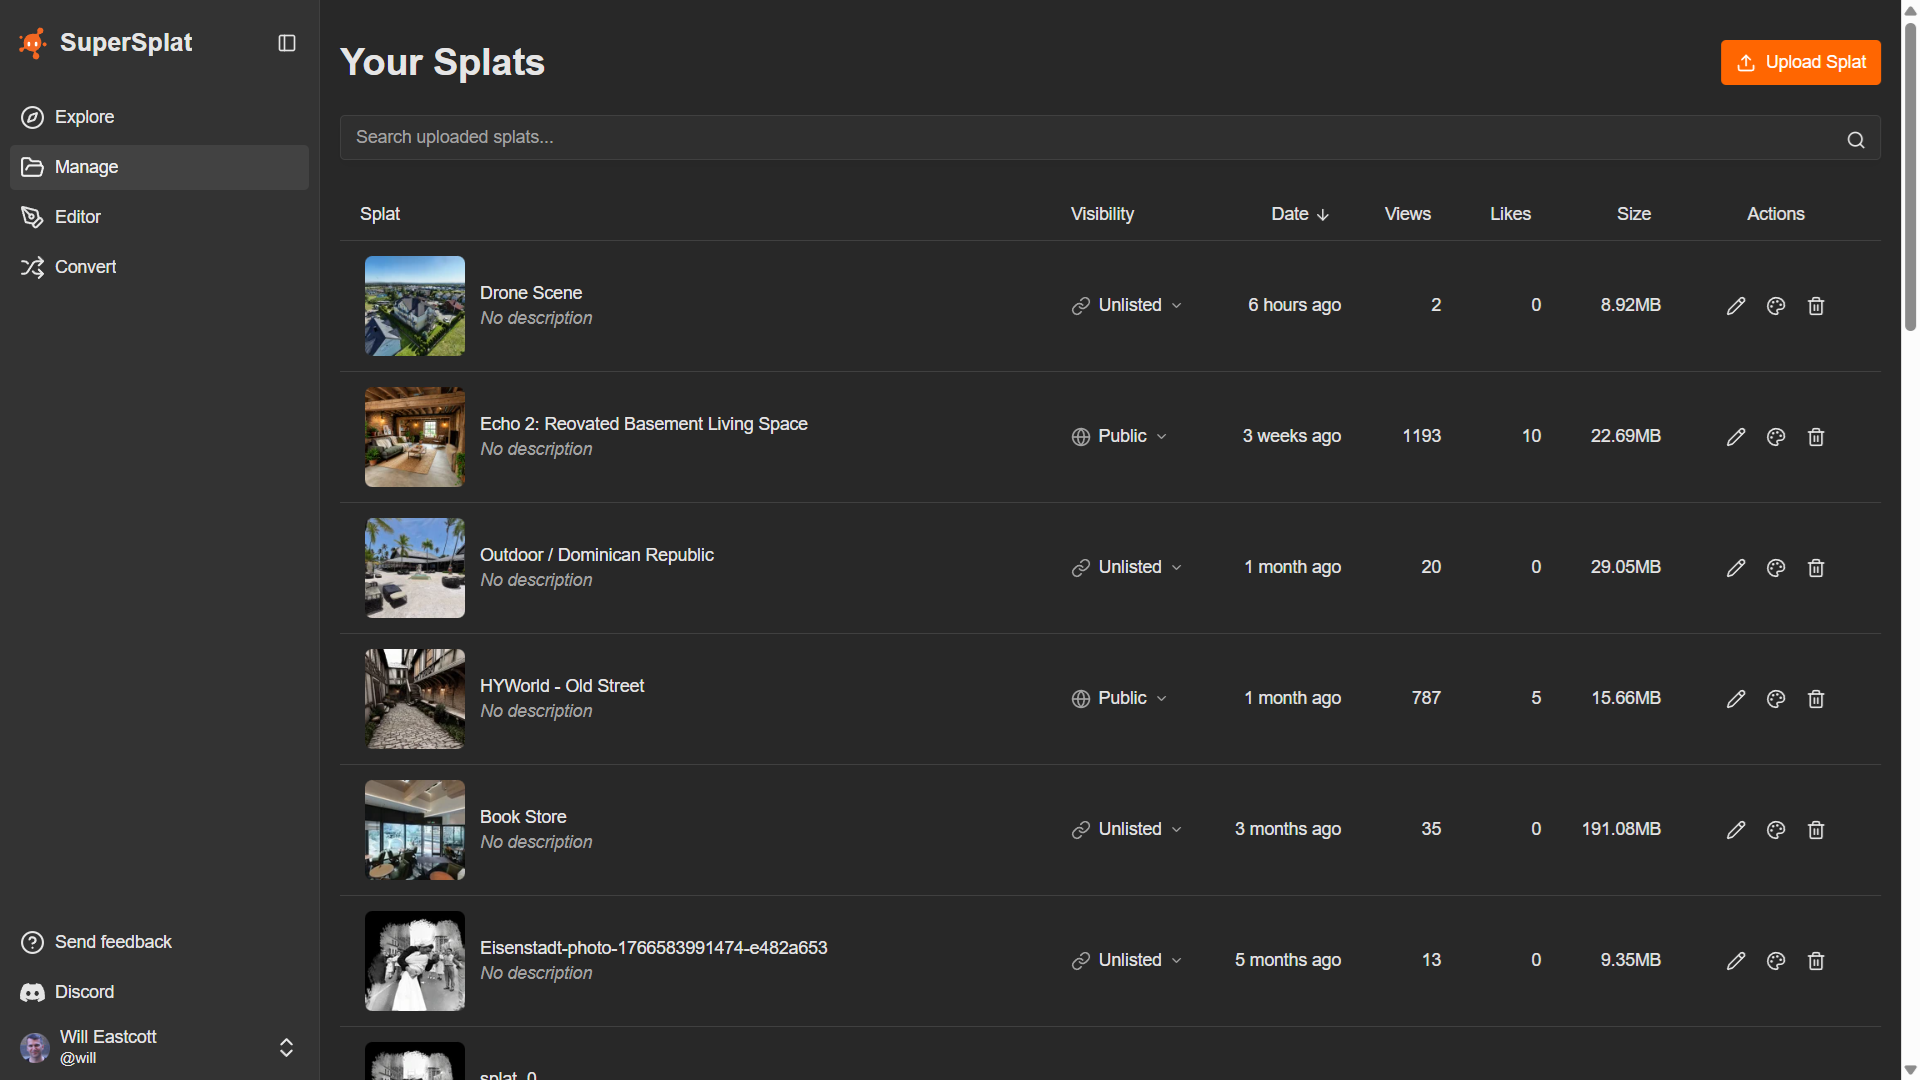
Three things worth doing on a first pass:
- Frame the opening shot. In the Scene tab, under Cameras, set the initial camera position, target, and field of view so visitors start from your best angle. See Cameras.
- Add a hotspot. In the Annotations tab, frame a detail, add an annotation, and give it a title and some text. Visitors click through hotspots like a guided tour. See Annotations.
- Add some polish. Under Post Effects, try a touch of Bloom or a Vignette, or pick a Tonemapping curve. See Post Effects.
Click Save in the header when you're happy. Edits are not saved automatically. Each save publishes the complete settings, so visitors see the update as soon as they reload.
5. Share it
Open your scene page at superspl.at/scene/<hash>.
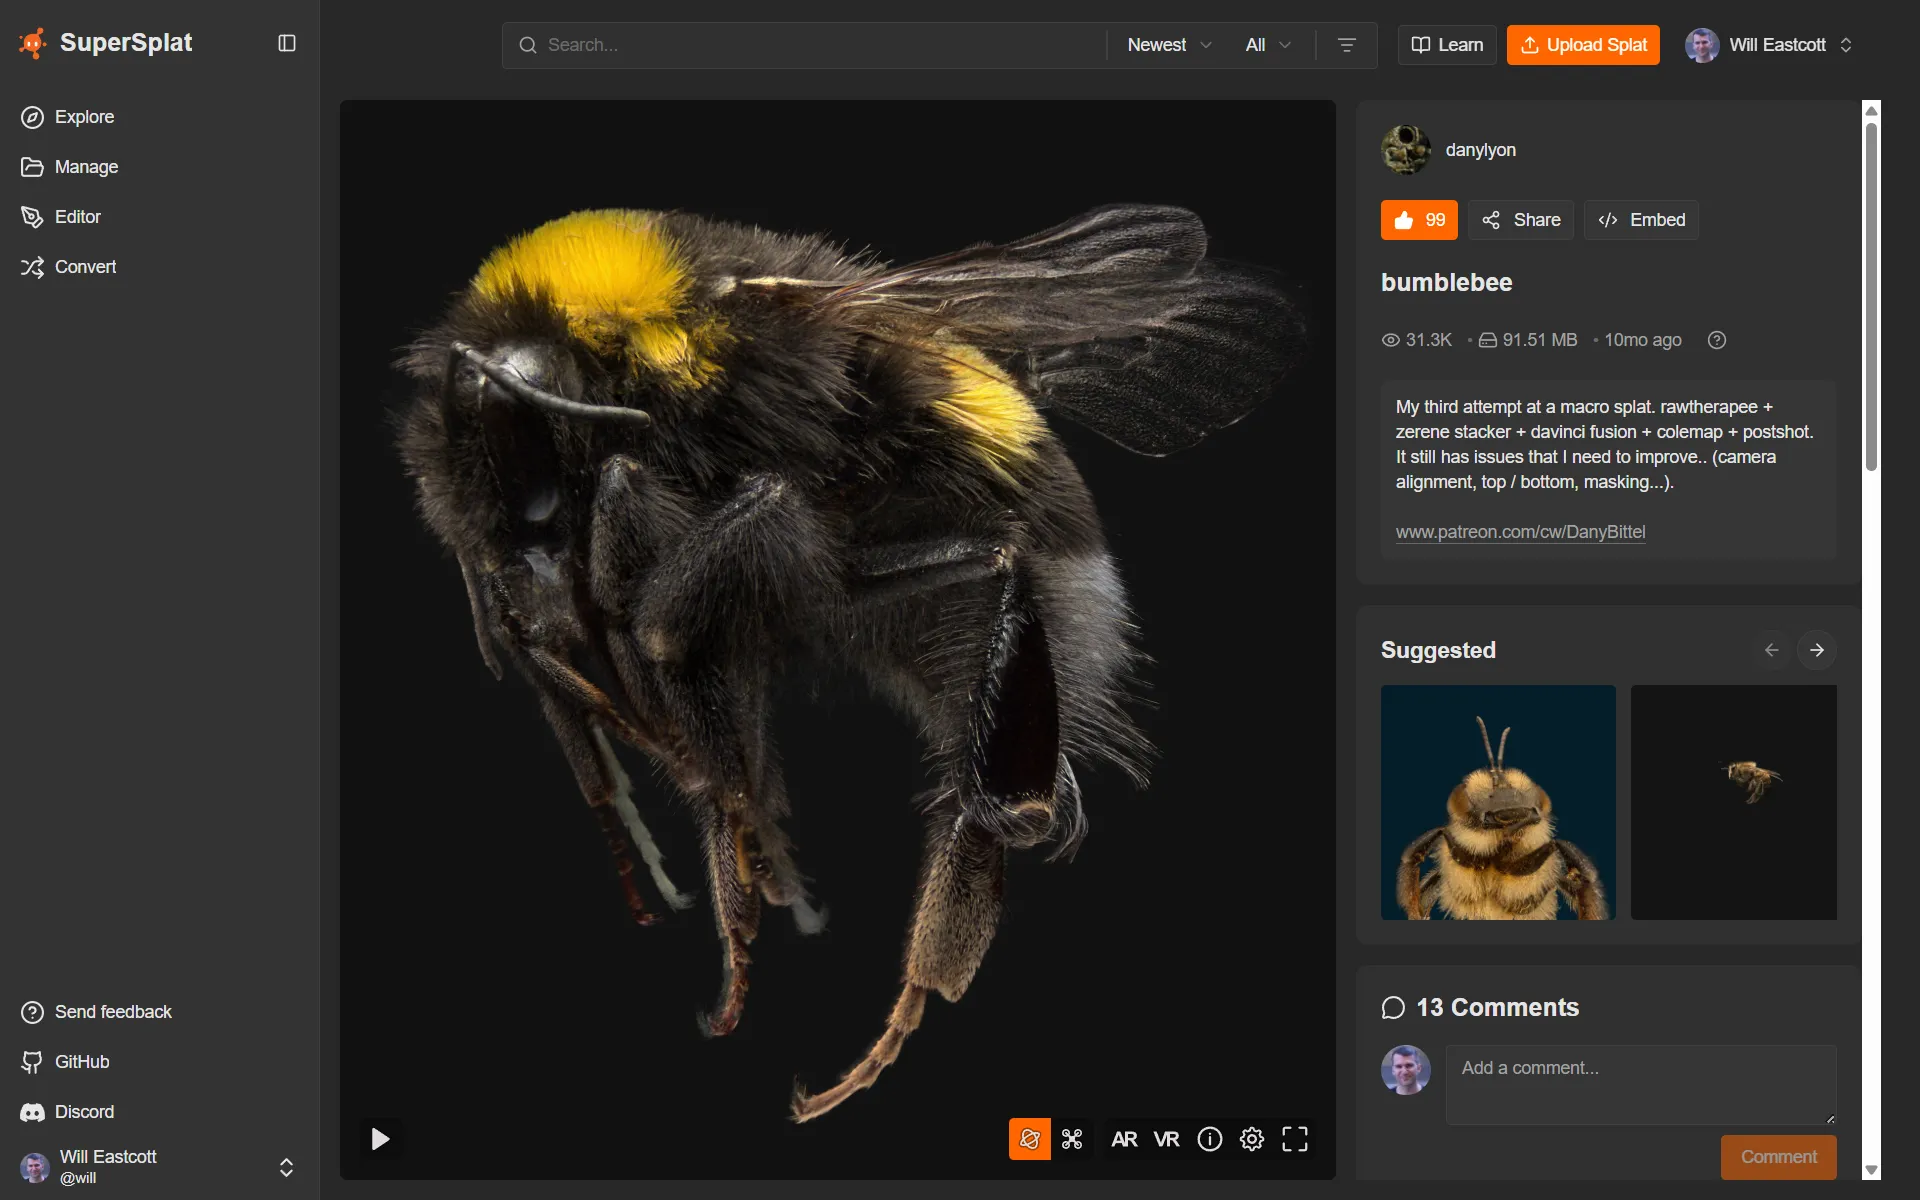
- Share copies the link or posts it to social platforms.
- Embed gives you an
<iframe>snippet for your own website. Later Studio changes show up there automatically. - To let visitors download your splat, enable Downloadable and pick a Creative Commons license on the Manage page.
- To appear in Explore and in search results, switch Visibility to Public in Manage.
Where next?
- Keyboard Shortcuts to speed up cleanup.
- Timeline to animate the camera and publish a flythrough.
- Collision to make a scene walkable in first person.
- Convert to change formats or shrink a splat without leaving the browser.
- Self-Hosting the Viewer to export a single HTML file you can host anywhere.
- API & Integrations to publish from your own pipeline.